Imaging Mass Spectrometry - SCiLS Lab Pro Remote Access
Bruker MALDI_IMS data can be processed and analyzed wiht SCiLS Lab Pro. To run SCiLS LAb Pro remotely, the softwre will contact the UCI MSF Imaging Workstation to obtain a floating license. Please close the software promptly when you are finished to release the license back to the pool.
A PC Imaging workstation should meet the following specs:
- Intel i7 or Intel Xeon with at least 4 cores
- Windows 10
- 64 GB RAM
- 1TB SSD
- Graphics card supporting OpernGL 3.2
SCiLS Lab Pro installation and floating license activation
- To download the SCiLS Software, create and register an account on the Bruker website. Login and go to:
https://www.bruker.com/en/products-and-solutions/mass-spectrometry/ms-software/scils-lab.html - Download the latest version of the SCiLS Lab (~237 MB).
- During installation, the installer should also install CodeMeter software and create a “container file” that is used to verify the license. If not, you may need to download the CodeMeter software separately. CodeMeter needs to have some settings changed so that it knows where to look for our server and find the floating licenses.
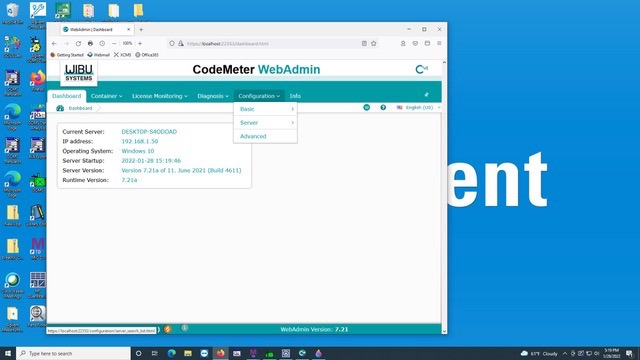
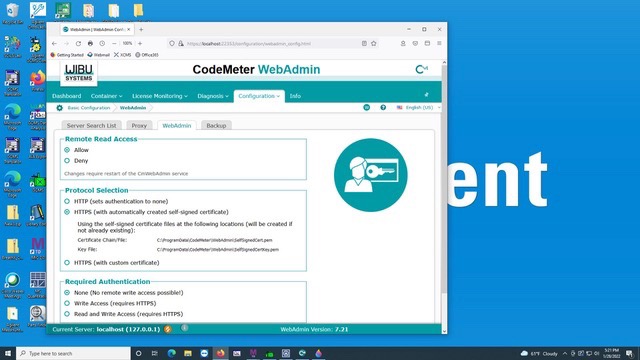
- To do so, open "Code Meter Control Center" on your Windows 10 PC and click on the bottom right button for WebAdmin.
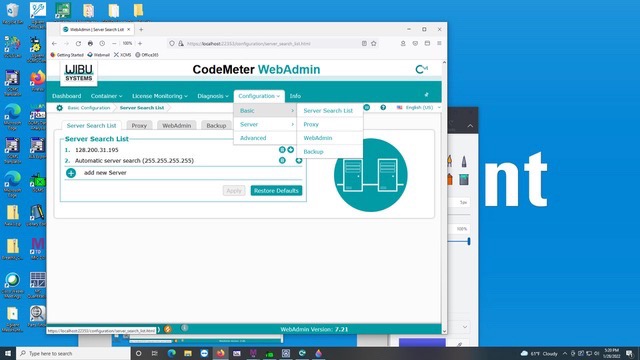
- Select Configuration —> Basic
- On the Server Search List Tab, add the IP address of our workstation: <xxx.xxx.xx.xxx> (obtain IP address from staff)
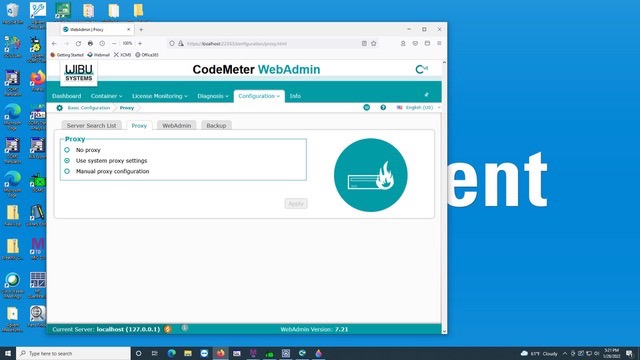
- For the Proxy tab, leave the default “Use system proxy settings".
- On the WebAdmin tab, allow Remote Read Access and for Protocol Selection use “HTTPS (with automatically signed certificate)". Your computer may complain at some point that this is unsafe but you can click through the warnings.
- You’ll need to restart the CodeMeter Server for changes to take effect. In the CM Control Center —> Process tab —> Restart CodeMeter Service.

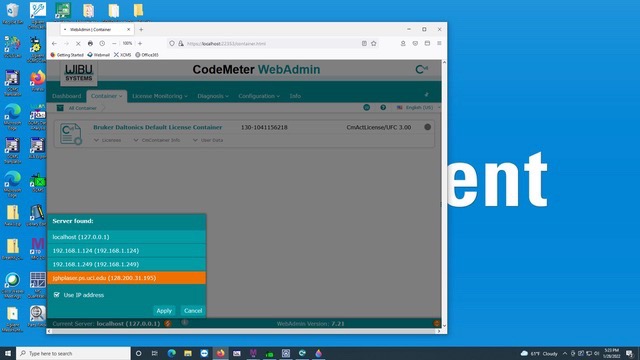
- You should now be able to check that our PC workstation is visible. On the bottom left of the WebAdmin page, click on Server Found: and select the correct server address (<xxx.xxx.xx.xxx>). Click Apply.
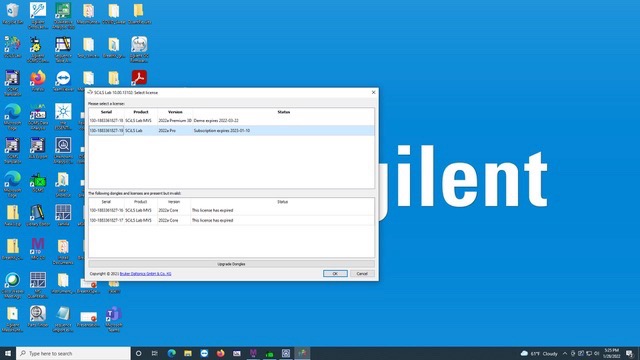
- Now open SCiLS Lab and you should have the license page populate as seen below. Choose SCiLS Lab 2023a Pro (expires 2023-12-31). SCiLS should now successfully open.